


INTRODUCTION
One of the features of being a Rolfing® Structural Integration student or practitioner is that you accumulate copies of various versions of the ‘Recipe’ – Ida Rolf’s ten- session basic Rolfing series – from different points in time and from different Rolfing instructors. Modern versions (let’s say mid-1960s onward) are all recognizable versions of the Ten Series as we know it today. The notes we are publishing here date much earlier, to the mid-1950s, a time when Ida Rolf was teaching her work primarily to chiropractors and osteopaths. They present an early iteration of a ten- session series, differing in many respects from our later Ten Series, just as the name for the work differs – at this point Rolf was calling it ‘Postural Integrity’, not having yet settled on the name ‘structural integration’.
These early notes come from Byron Gentry, DC, who was a student in one of these 1950s classes for chiropractors and osteopaths. Gentry studied with Rolf, but he also became a friend, and they shared regular correspondence over the years (see Figure 1 for an example of one of Rolf’s letters to Gentry). He also had a significant influence on and contact with many Rolfers and structural integrators over the years, as seen from Linda Grace’s article (page 31), as well as the testimonials to his work and his own teaching that preface his book (Gentry and Gentry 1998).
Given this influence, it’s worth saying a bit more about Gentry besides his service in preserving for us this early documentation of Rolf’s work. While Gentry studied with Rolf and used her techniques, and while he was a chiropractor, he was neither a Rolfer nor a chiropractor in the usual sense. His interests and professional experimentation extended to the energetic realm – resolving physical and other issues through powers of the mind and projecting energetic healing. Increasingly he did his work over the phone, including helping Dr. Rolf when she called to get assistance with intractable cases (Gentry and Gentry 1998, 7, 114-115, 144). Rolf
the scientist was also fascinated by and gifted in this energetic realm, so perhaps this shared role of scientist and mystic was part of their bond. In the acknowledgements that preface his book Gentry praises Rolf and comments on their personal and professional friendship and interchange:
I am especially grateful to the late Ida
According to Erik Dalton (2011), Gentry and twelve other chiropractors attended Rolf’s first two-weekend class, in Fort Worth, Texas in January of 1955. In an interview with Rob McWilliams (2009, 15), Dan Gentry confirms that Byron Gentry (his stepfather) was in “the very first class that Ida ever taught” although he is “not sure of the exact year or location.” So it is quite possible that these notes, dated January 11, 1955, are from Rolf’s first training.
Despite what we know or surmise of the notes’ provenance, we are missing some information. The extant version is typed on the letterhead of the Green Feather Organization (GFO; see Figure 2), with Byron Gentry DC listed as the vice- president. Was this stationary merely used for the notes, or did GFO sponsor the class? Did Rolf see and confirm the accuracy of these notes? Are we sure that Gentry actually made the notes, or did he just possess and share a copy of notes made by someone else connected to GFO, since it is not his personal letterhead? The collective wisdom of the SI community is that Gentry wrote the notes – that is always the story when copies of the notes circulate, as they have for decades – so we hold that to be tentatively factual.
Regardless of these questions, what is important about the Gentry notes is that they are a contemporaneous document of Rolf’s teaching, from a time when much of the Rolfing history is hearsay. Although these notes have been circulating among various practitioners from hand to hand and computer to computer for decades and are available in the Dr. Ida Rolf Institute® library, we believe it is of important archival and educational value to present them here in our Journal for study by all in our community and for public access.
Following these notes, we have two related articles: 1) Szaja Gottlieb’s interview with Jeff Linn, one of the SI community’s great archivists, where they discuss the notes extensively; and
2) Linda Grace’s memoir about encountering the Gentry notes in the early 1980s, and then her personal encounters with the man himself.
A few caveats to the transcription below. While we wanted to keep the notes as exact as possible to the original version, there were many typographical errors. Dr. Rolf is referred to as “Dr. Roff,” suggesting either that Gentry typed these notes before he knew her well, or that they were typed by a secretary – which may be the case as the original has many anatomical words misspelled. In reproducing the notes below, we have corrected the most obvious misspellings and occasionally adjusted erroneous punctuation for clarity, but otherwise kept the notes as close to duplicate of the archival original as possible, even when sentence structure is awkward.
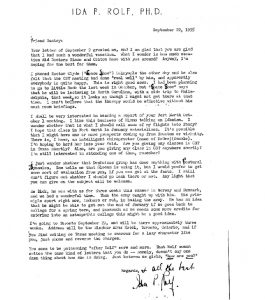
Figure 1: September 1955 letter from Ida Rolf to Byron Gentry, DC, an early student who became a friend and correspondent,
a professional colleague with similar interests, as well as someone she consulted on difficult cases.page of the archival Gentry
notes on ‘Postural Integrity’. 20 The Rolfing ‘Ten Series’ – Part 1
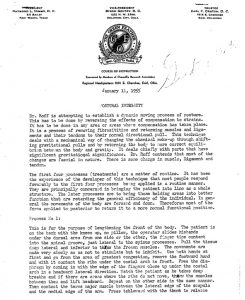
Figure 2: Scan of the first page of the archival Gentry notes on ‘Postural Integrity’.
References
Dalton, E. 2011. “Ida Rolf 1955 Letter to Byron Gentry.” Dalton Myoskeletal™ blog post 2/7/11 blog post. Available at https:// erikdalton.com/blog/ida-rolf-1955-letter-to-byron-gentry/ (retrieved 2/23/19).
McWilliams, R. 2009 Mar. “Byron Gentry, D.C.: My Dad, My Friend, My Mentor: An Interview with Dan Gentry, Certified Rolfer™.” Structural Integration: The Journal of the Rolf Institute® 37(1):15–17. Available at http://www.pedroprado. com.br/articles/byron-gentry-d-c-my-dad-my-friend-my- mentor/?lang=en (retrieved 2/24/19).
Gentry, B. and M. Gentry 1998. Miracles of the Mind: How to Use the Power of Your Mind for Healing and Prosperity. Highland City, Florida: Rainbow Books.
THE ‘GENTRY NOTES’
January 11, 1955 Postural Integrity
Dr. Rolf is attempting to establish a dynamic moving process of posture. This has to be done by reversing the effects of compensation to strains. It has to be done in any area or areas where compensation has taken place. It is a process of removing fibrosities and returning muscles and ligaments and their tendons to their normal directional pull. This technique deals with a mechanical way of changing the chemical make- up through shifting gravitational pulls and by returning the body to more correct equilibrium between the body and gravity. It deals chiefly with parts that have significant gravitational significance. Dr. Rolf contends that most of the changes are fascial in nature. There is some change in muscle, ligament and tendon.
The first four processes (treatments) are a matter of routine. It has been the experience of the developer of this technique that most people respond favorably to the first four processes being applied in a routine manner. They are principally concerned in bringing the patient into line as a whole structure. The later processes are to bring those holding areas into better function that are retarding the general efficiency of the individual. In general the movements of the body are forward and down. Therefore most of the force applied to posterior to return it to a more normal functional position.
Process No 1:
This is for the purpose of lengthening the front of the body. The patient is on the back with the knees up, no pillow, the operator slides his hands under the dorsal area from one side or the other, the finger tips contact into the spinal groove, just lateral to the spinous processes. Pull the tissue deep lateral and inferior to thaw the frozen muscles. The movements are made very slowly so as not to stimulate but to inhibit. Use both hands at first and go from the area of greatest congestion, remove the footward hand and with it contact the ribs under the costal arch in front. Free the diaphragm by coming in with the edge of the fingers close up under the costal arch in a headward lateral direction. Watch the patient as he takes deep breaths and if there are areas where the ribs do not move, thaw the muscles between them and lift headward. Repeat on the other side in the same manner. Then contact the teres major muscle between the lateral edge of the scapula and medial edge of the arm. Press tableward with the thumb to release the teres tension and give better support to the arm. Now check the structures of the top of the shoulders (trapezius). Many times they are holding the shoulders up and forward. Spread them by taking the tissues back and down while the indifferent hand pulls elbow-ward on the anterior portion of the deltoid.
With the patient still on his back, knees up, chin in, have him pitch the knees and roll the hips from side to side from one hand to another. Notice where most of the tightness is, where there is lack of movement. Usually it will be in the lateral hip structure, the tensor fascia muscle and the fascia lata. Now put the patient on his side and use the elbows or thumbs or knuckles to carry the tissue by stretching, pushing, torquing, etc. from the midline that is up, tableward in both directions. The anterior structures are carried to the midline posteriorly. Pay particular attention to stretching and relaxing the tensor fascia muscle and the ligaments around and above the head of the femur and the greater trochanter. Then relax the fascia lata all the way down to the knee. This may be done with the knuckles or the edge of the forearm, or the thumbs. Then have the patient turn on his back again, with his knees up, chin in, tuck his tail under with his hips slightly raised and his waistline down against the table. The operator is at the patient’s feet and he slides both hands under the hips back of the sacrum and coccyx. The patient’s knees and feet must be together. Pull the tissues with the tips of your fingers down and out on the sacrum and coccyx. Remove the hand from the side that is least contracted and place it on the tissues above the pubes and press headward while the hand below pulls footward. Now have the patient grasp his knees with his hands, pull the knees up as far toward the chin as possible. The operator contacts half way between the knees and the ischia with his knuckles and slowly presses and lets his hands slide from the contact point to the ischia stretching the hamstring muscles. Repeat this move several times. The last move in this process is the neck. Patient on his back, no pillow, knees up, chin down to chest, the posterior portion of the neck elongated as long as possible. The operator sits at the head of the patient. Slip the fingers of the right hand under the neck from right to left, contact the muscles and ligaments on the left side of the neck, just posterior to the midline of the neck laterally, with the fingertips pull the muscles and ligaments posterior toward the midline in back, while the other hand braces the head and turns the face toward the left. Contact the tense congested muscles with deep firm stretching pulls, laterally toward the right and headward toward the occiput. When you have relaxed the tissue somewhat then use thumb or knuckle contact on the [sternocleidomastoid] muscle at its mastoid insertion. Carry the tissue tableward with a deep stretching contact. Repeat
the same performance with the opposite hand on the right side of the neck. Pay particular attention to the attachment of the ligamentum nuchae to the occiput and stretch it so that the vertebra will have room enough to slide back to their normal position.
Process No 2:
The first process was to lengthen the front and raise the ribs. The second process is to lengthen the back so the abdomen will have room to move back to a more normal position. Set the patient in a chair, feet and knees together, being sure the feet are on the floor, with their chin in have them bend forward and note the spots where the spine does not elongate or move. Begin at the highest point of lack of movement and work downward carrying the superficial muscles with the patient’s head bend forward and down to keep the tissue stretched firmly and to avoid having the spine carried further forward. Use the elbow either above or below its point to contact the spinal groove just lateral to the spinous process. Make slow deep pressure strokes over the areas of lack of movement. Repeat on both sides of the spinal groove. These muscles may also be loosened with the knuckles with the same movement both at the same time.
Feet: Increase the movement in the ankles by freeing the frozen tissue above below and on the sides of the feet. This may be done by use of the knuckles, fingertips, thumbs in a direction to return the tissue to a more normal pull. The lateral and medial malleoli should be horizontal and the hinge of the ankle should be straight across from one to the other. Pull the tendons loose from the valleys, try to get the dehydrated tendons in to a state of hydration. Soften and lengthen the tendons. Loosen and hydrate the retinaculum which holds the tendons in place. If the tendons are bunched too much in the midline, spread and pull them apart. If they are too far apart and flat on top causing the foot to pull to one side or the other then bring them more to the center to make the pull on the feet more normal. If the Achilles tendon is too short lengthen it by pulling on the attachments to the calcaneous and by stretching the muscles attached to the tendons. Most feet are too short from the malleoli back to the heel. Carry the tissue from the ankle back and down both medial and lateral. Stretch the muscles on the sole of the feet in order to strengthen the lateral arch.
As a general rule by loosening the feet the strain will be shifted to the knees. They may be pulled out, bowed or in (knocked) or in any modification of these distortions, they should move straight ahead and back when flexed and extended. Have the patient stand, head up, chin in, great toes and ankles together tuck the tail under, the waistline back and sit without leaning forward. Start sitting in this position so the knees bend, keeping the knees together. The operator kneels in front or behind, depending upon where the need for guiding the muscles in to help relieve the pull that is causing the distortion. The operator’s job is to make the muscles pull more symmetrical so that the knees will work straight forward and back when they are flexed and extended. Have the patient sit until the knees are only slightly flexed, then have him raise back up, head first – repeat several times. The operator may have to drag down with his knuckles on any of the muscles holding in the leg below the knee. Palpate to determine where the most strain is when he is in the semi-sitting position.
Process No. 3:
After having lengthened the front in the first process and the back in the second process the third is to lengthen the sides. The quadratus lumborum is too short as well as the lateral shoulder girdle muscles. Lay patient on the side and bring the quadratus back from anterior to posterior by using the knuckles, thumbs, fist or elbow. Under stress of activity, the strands of the quadratus pull forward and have to be carried backward. Use knuckles and elbows to carry the tissue all the way from the upper half of the ilium to the scapula and the muscles back of it and all along the side on the line from the mid axilla to the mid ilium area. Carry the tissue toward the midline both front and back. After stretching both sides, you will not have room for the abdominal tissue so you must stretch the ribs up and out, loosen the diaphragm and stretch the abdominal contents in all directions and as deep as possible, where there are any areas of fixation. Then, with the patient on his back, knees up, tail under, get your hands under the sacrum and pull down to lengthen the lumbar spine as in the first processing. After this the neck will be telescoped and you will repeat the cervical technique similar to the first process. Finish by having the patient sit and have his head hang and go over his back with your knuckles, take the tissue downward and medially from both sides.
If there seems to be adhesions in the abdomen they may hold up the progress of moving back, so you must go in deep and spread apart and pull to relieve the fixation deep between the abdominal tissue, both hands are used with the tips of the fingers of one hand going in one direction and the fingertips of the other hand going in the opposite direction.
Loss of tone in the extensor muscles is the cause of drooping, shortening and general poor posture. The weight of the body must be transmitted to the head of the femur. This weight should go through the knee, and fibula and tibia and joint of the fibula and tibia and then through the foot directly under the joint of the ankle and tibia, not on the ball of the foot.
You may start the third process by working on the teres major to free the shoulder and let the scapula back, or free the serratus anterior. Take the tissues from the mid-line laterally each way to the center. You may also start, or later go to the quadratus lumborum, freeing the twelfth rib if necessary, and filling in the area above the ilia. Then on the back, check and relieve strain on the sacrum and coccyx. With the patient still on the back, check the cervical area, finish with the patient sitting, forehead on knees to check any tight or holding muscles in the spine or between the ribs.
Any time there is a stubborn place and doesn’t seem to want to turn loose, go back to the sacrum and gluteals and releases them, they may be holding the other place that wouldn’t turn loose.
When the back ceases to make progress or improve, check the deep structures of the abdomen, they may be holding up the back. Something deep inside the core of the body is holding when there is a stubborn place that won’t give.
Process No. 4:
Adductor technique: The legs are tied up on the medial side all the way from the ankles to the pubes. The lateral side has already been stretched so the medial is behind in the process. Place the patient on the side, work first on the medial aspect of the tissue above the ankle, or maybe all the way down to the foot. The tissue is carried from the medial midline to the anterior and posterior midlines. Hydrate the dehydrated tissue. Go all the way to the area above the knee. Then pay particular attention to the adductor muscles, both above and below the knee. Do both sides (legs). Then have the patient stand and hold the head up, tuck the pelvis under, bend the knees slightly and sit. Bring the tissues away from the bones and free the calf ankle area. The great toes and ankles, calves, knees and mid-thighs should touch, to be normal (but not the heels). Eight out of ten men, of forty years and above, have extreme trouble above and below the pubes, and between the pubes and the ischii. Work out the pubic, suprapubic and infra-pubic and medial ischial areas. The ligaments will be fibrous and cordy over the bones. Hydrate them with a slanting, stretching contact in the direction in which it seems best to carry them. Then finish by sitting patient up, putting their forehead on their knees, stretch the back muscles down over the lumbo-dorsal junction with the knuckles of both hands. The adductors above the knee are spread, just as the ones below the knee, with the patient on the side, by taking the tissue from the midline both ways. The long axis of the leg is quadrated and the tissue is carried laterally, from any angle that is up. On women, especially those who are inclined to be a little on the rotund side, the adductors have come too far forward. They must be carried back and up. They may stand, with ankles and great toes just below the pubes, contacting a portion of both left and right adductors, and as the patient rolls their pelvis under and sits with bended knees slightly, he carries the adductors back and up to help train the muscles to take on a more normal pattern of movement.
Process No. 5:
The deep structures of the feet and legs: Try to get more movement in the ankles and feet by repeating some of the manipulations done in the processing No.2 The lateral muscles of the shin, as well as the medial ones are too tight. Raise the level of the bend of the ankle. Make the medial and lateral malleoli parallel in their hinge action. After the feet are loosened, the strain will move upward to the knees, therefore, your attention must be directed to the muscles of the lower leg and then to the knee. If the knee is in distress, have the patient stand, tuck the tail under and assume a partial sitting position. As the knees bend forward, work on the holding muscles to lessen the strain and equalize the strain to all muscles. As the strain goes out of the knees it will shift it upward to the pelvis, where the patient will have to be placed on his back in order to clear the holding muscles. Big ankles are usually due to flat feet. They can be changed and made to fit the body build to which they belong. In order to have normal function, the extensor muscles have to extend at the same time that the flexor muscles are flexing. If and when you get your hands under the butt, and it is leaden, you have left a place of imbalance somewhere, therefore you should recheck to see where the tie-up is and free it. As the processing goes along, from time to time, there will be changes in the general stature and they will not always appear for the better. The patient may protrude in places where they shouldn’t because they are compensating for changes that they are making. Don’t try to clear up the entire area at one time but go all over the body to bring the different areas along simultaneously, instead of clearing up one area completely. All parts must come along together as near as possible, that, that is holding, has to be treated. And that, that is free, must be left alone.
Leg Exercises: Patient, sitting with the legs extended, knees and ankles together, roll legs out from hips, then bring them in, ankles first, after the ankles touch, pull the toes up toward the head, then pull the entire foot up toward the head.
Let them roll out again, repeat several times per day. This is to be used more for children. Children can do much more for themselves by doing exercise than can adults, because their ligaments and muscles were not tied down by fibrotic and dehydrated tendons.
Process No. 6:
Shoulder, girdle technique: Get movement between the clavicular acromial joint, raise the clavicle by releasing the subclavius muscle. Start on the least tense side first, using fingers or knuckles on the subclavius muscle with the fingers of the indifferent hand on the opposite side of the clavicle as support. The attachments and the extent of the pectoral muscles should be freed of tension and fibrosis. The arms should hang at the sides with the back of the hand facing forward. In these conditions, the levator scapuli are often too short and have the scapula jacked up too high. Have patient sit with knees up, forehead on knees. Use elbows to carry the tissues of the upper shoulder toward the spine to try [to] free the spine and broaden the shoulders. Then with the patient on the back further free thee arm by carrying the deltoid muscles laterally toward the elbow. Free the area of any fibrosis under the pectoralis and serratus anterior along the ribs. Pay attention to the diaphragm to free any holding areas along the costal arches. Next work on the neck, finish by working on the back at the lumbo-dorsal junction in the sitting position. The general pattern is to look to the shoulder girdle, or yoke, which is a secondary thing from the pubes and illia, but has to be brought along and as you work on the subclavius, you will raise up and back both above and below the clavicle. Then the deltoid and the insertion of the pectoralis are brought down toward the elbow. Then the elbow is turned so the palm is back.
Turn the arm at the elbow out, lateral from the palmar side and medial by the opposite side. Slide on down the radius, ulna position by stretching between the bones, trying to get onto the interosseous membrane. You can’t do it all at one time but you have to get started getting the outside layer of tension cleared away. This may be given earlier than the 6th process to anyone who needs relief from a specific arm problem.
Process No. 7:
Pay particular attention to pelvis, the iliacus and psoas muscles and the posterior muscles of the sacro-iliac area. Now check the pubic attachments of the rectus abdominus, then the attachments to the ischium, medial, lateral, posterior and anterior. Check the ischial rectal fossa. Clear the ilium in the area of the anterior superior iliac spine, both medial and lateral along the iliac crest. Clear it out and move the tissue down from the crest. About the 7th or 8th time you are getting down to where you can really see what the major things are that are holding and you can commence to see what is going to have to be done. Now have the patient sit up and bend forward and watch for the holding areas in the back and [where] the extensor muscles are not extending and the vertebrae are not moving. Use your elbows or knuckles in these areas to free the tie-up. With the patient on the back have them do quite a bit of raising of the pelvis up and under while they are being processed. While the operator puts pressure with both hands on the abdomen have the patient arch the back up toward the hands, then let it down slowly and reverse it into a raised pelvis and a receded waistline. When the patient is on the back always have them to keep their knees up, both feet and both knees together, chin in toward chest and neck extended as long as possible from the top of the head.
Elbow Technique: Patient on back, arms at side, palms down, have patient slowly move the arms and the elbows straight out, straight in, not moving anything else. Dr. pulls lateral on the muscles above the elbow on the underside, with one hand, while the other hand carries muscles medial on the top side below the elbow.
[Processes No. 8-10:]
In the 8th, 9th and 10th processes, the work is less routine and more catching the areas that are dragging on holding. Look for strain in the pelvis and abdomen and you may have them lie on their back and take a double hand contact with fingertips about an inch above the umbilicus with the direction, posterior, superior; have them turn his tail under and raise the umbilicus as high as possible, then have him lay it down slowly and arch the back up in the middle against the finger contacts. Now pay attention to the origin of the sartorius and rectus femoris on the anterior, superior iliac spine. Then check the iliacus and inguinal area. There is usually work to be done on the chest by coming between the ribs with the fingers and clearing up the intercostal muscles and wedged areas. Check the back, shoulders and the adductor muscles. Clear the sacrum and coccyx areas, then work on the neck. At the end of the 10th hour you should be able to distinguish a core in the person.
The middle of the person should be able to extend and move without the outside muscles moving very much. Also when they flex forward, they should also extend headward from the 12th dorsal down. The 12th dorsal is the dividing line and after you get the extensors moving in these directions, then that is the direction to carry the tissues when finishing a treatments, up above the 12th dorsal and down below it.
Rib technique: Release the ribs in back first. Take hold of the heads of the ribs behind, get under the holding muscles and pull down and out, raise the ribs in front. Follow the intercostal spaces around and where it is tied down by fibers, release them with a finger or knuckle in the direction to make it more normal, which is usually up and back in front and forward and down behind.
Groin technique: The groin is the seat of much pelvic malfunction. Get into the iliacus and onto the psoas is [if?] possible. Carry the psoas medial mostly and superior. The iliacus should be carried posterior and medially. Find where it is bunched and spread the bunched fibers so as to make it smooth and pull evenly.
Ischial technique: The attachments of the hamstrings to the ischia are very important. Check to see if the ischia are too close together, or if they are spread too much. If they are too close spread them by checking the attachments on the medial side of the ischium. Use elbows on the hamstrings and the ischium, with the patient on his back and his knees pulled up under his chin. Also spread the ischia with the thumbs and fingers by pulling laterally on the tight muscular attachments. Go [to] the attachments of the hamstrings at the knee and use thumb, knuckle and elbow to relax them. Use the elbow on the rectus femoris just above the knee and just below the anterior superior spine. Loosen near the tendinous attachments. Just above the knee are some horizontal or oblique bands that encircle the leg. They must be stretched and loosened.
Rib technique: The upper ribs may be being held by tie-ups under the scapula or in the axilla, also raise on both ends of the ribs, front and back while the patient extends his head and takes a deep breath to break it out of the stuck area. Also the area of the clavicle and shoulder girdle muscles must be cleared to raise the ribs. When any area sticks too long try the sacrum. Drag down on the sacrum and lengthen this area and you may get help to turn loose all areas, even the neck.
Neck technique: As the superficial structures of the neck are loosened, and the deeper more fibrous ones become apparent, you may have to spend an entire hour sometime to get the neck coordinating with the other parts of the body. Go from side to side many times, so as not to carry either one side of the neck too far in advance of the other side, in that way you can go in further and keep a better balance. Always keep the ligamentum nuchae long enough to let the other structures fall back. Try to get equal pulls on the two sides where the ligamentum nuchae attaches to the occiput. Sometimes distant areas in the body will not turn loose because of bunched and hardened fibers along the occipital ridge. If that is the case these will have to be freed and loosened before further progress can be made.
Arm exercises:(Children especially) Patient on back, extend arms horizontally at sides. Bring hands together in front of face, full length, with thumbs touching, then return arms to floor. Now raise hands and touch little fingers together. Return arms to floor. Now put the backs of the hands together and return arms to floor.
The Gentry Notes on ‘Postural Integrity’[:]